


New
Arrivals/Restock


Vinyl Record Wall Mount – Pack of 6 Floating LP Album Display Holders | Pine Wood with Walnut Matte Finish | Easy Install Wall Decor for Music Lovers, Vinyl Collectors & Home Decor

 4.4 (64 items)
 Limited Time Sale
Until the end
02
53
32
$17.99 cheaper than the new price!!
Free shipping for purchases over $99 ( Details )
Free cash-on-delivery fees for purchases over $99
Free cash-on-delivery fees for purchases over $99
See all stores
Please note that the sales price and tax displayed may differ between online and in-store. Also, the product may be out of stock in-store.
New $29.99
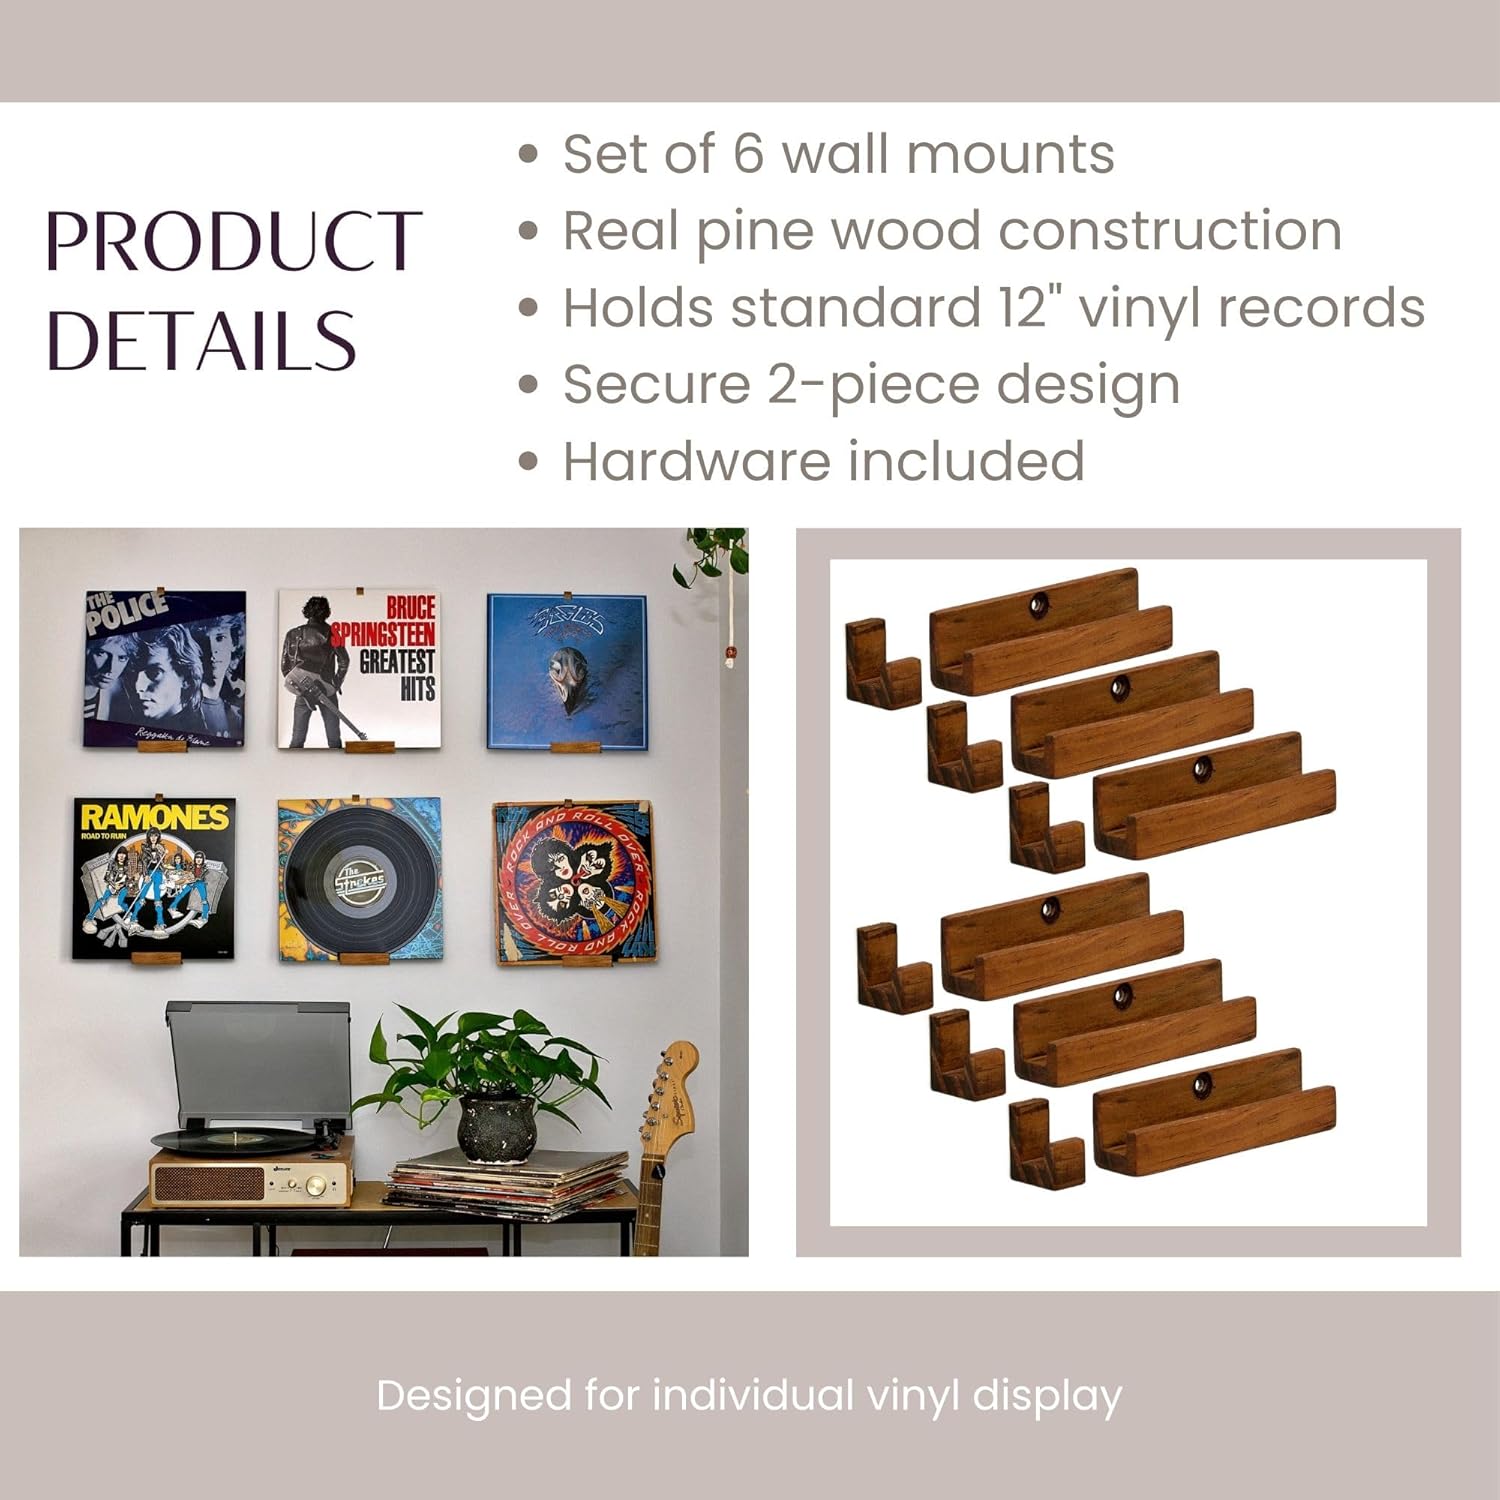
Product details
| Management number | 217480463 | Release Date | 2026/04/19 | List Price | $12.00 | Model Number | 217480463 | ||
|---|---|---|---|---|---|---|---|---|---|
| Category | |||||||||
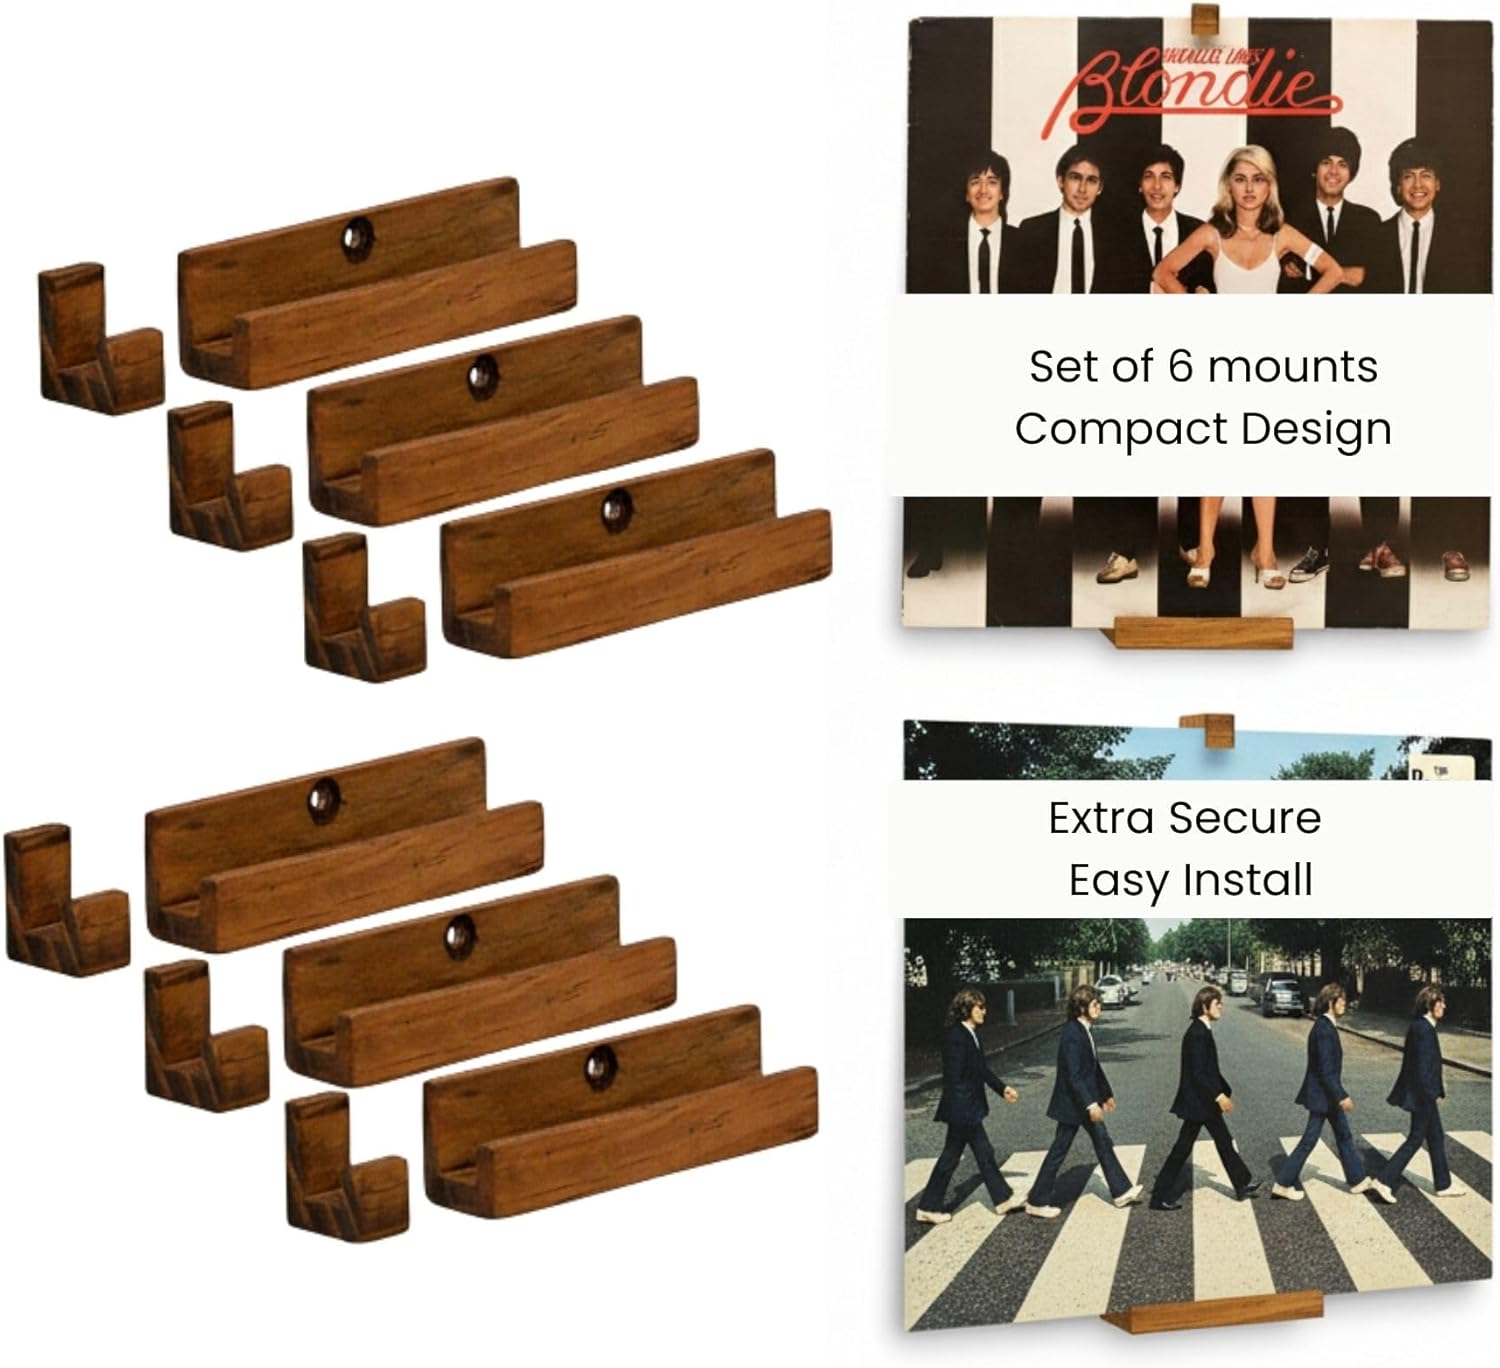
- FLOATING VINYL RECORD WALL MOUNT — PACK OF 6: Showcase your favorite LP albums individually as striking wall art with this 6-pack vinyl record display set. Each floating mount holds a single 12" record securely, turning your vinyl collection into stunning music room decor — perfect for small spaces, apartments and decor lovers.
- PINE WOOD BUILD, WALNUT MATTE FINISH — BUILT TO LAST: Crafted from durable pine wood with a rich walnut matte finish, these LP album display holders combine strength and elegance. The warm wood tone complements both modern and vintage home decor styles, blending seamlessly into any living room, bedroom or music room.
- SPACE-SAVING NOW-PLAYING DISPLAY: Highlight your album artwork without the clutter — each minimalist floating shelf keeps your vinyl record wall decor clean and intentional. Ideal for apartments, dorms, or any room with limited wall space. Showcase your now-playing record or rotate your collection seasonally for fresh inspiration.
- EASY INSTALL — NO SPECIAL TOOLS NEEDED: Includes all mounting hardware for a quick, stable and renter-friendly setup. Mount your entire vinyl record wall display in under an hour. The dual-piece locking design keeps every LP record holder secure with no slipping or damage to your collection.
- PERFECT GIFT FOR VINYL COLLECTORS & MUSIC LOVERS: A thoughtful gift for birthdays, housewarmings and holidays — this versatile 6-pack LP record display works beautifully in living rooms, bedrooms, studios and music corners. Give the vinyl collector in your life a stylish, space-saving way to celebrate their passion.
| Size | 3.74 x 0.87 x 1.06 inches |
|---|---|
| Color | Walnut |
| Shape | Rectangular |
| Set Name | 6-pack |
| Room Type | Bedroom, Classroom, Library, Living Room, Playroom |
| Brand Name | Life Reprogrammed |
| Item Depth | 0.87 inches |
| Model Name | SpinFrame |
| Shelf Type | Ledge Shelf |
| Style Name | Rustic, Modern |
| Unit Count | 6.0 Count |
| Finish Types | Matte |
| Manufacturer | Life Reprogrammed |
| Model Number | SF-W6MW |
| Material Type | Pine |
| Mounting Type | Wall Mount |
| Item Dimensions | 0.87 x 3.74 x 1.06 inches |
| Number of Items | 6 |
| Shelf Thickness | 0.87 Inches |
| Furniture Finish | Walnut |
| Installation Type | Wall Mounted |
| Number Of Shelves | 6 |
| Required Assembly | Yes |
| Additional Features | Durable, Lightweight, Space Saving |
| Included Components | High Quality Hardware Components |
| Age Range Description | Adult |
| Manufacturer Part Number | SF-W6MW |
| Item Dimensions D x W x H | 0.87"D x 3.74"W x 1.06"H |
| Recommended Uses For Product | Displaying Art Prints & Picture Books, Displaying Vinyl Records & LP Album Collections, Music Room, Living Room & Bedroom Wall Decor |
| Assembly Instructions Description | Assembly Instructions: Step 1: Choose your spot — Find a suitable location on your wall and measure out the area where you'd like to hang your records. Step 2: Drill your pilot hole — Drill one pilot hole using a drill bit slightly smaller than the included wall plug (we recommend 5.5mm for the 6mm plug supplied). If you have plasterboard or hollow walls and the plug doesn't grip, you may need a specific drywall or hollow wall anchor. Step 3: Secure the mount — Take the included screw and attach your pine wood mount to the wall. Before fully tightening, use a spirit level or smartphone level app to get it perfectly straight. Once level, finish tightening BY HAND — do not use a power tool as this risks cracking or damaging the shelf. Step 4: Place your record — Carefully place your 12" LP record on the mount. You can display it as is, or use the included self-adhesive top piece to secure it in place. Step 5: Attach the top piece (optional but recommended) — Peel the adhesive backing, lean your record slightly away from the wall, and rest the top piece on the center of the record sleeve. Lean the record back toward the wall and lift the tab up just a few millimeters before sticking — this allows freedom to slide records in and out easily. Important: When pressing the top piece down, DO NOT press directly on the front lip as this can break it. Always press from above onto the back of the tab, or press the record sleeve against the back of the tab to secure it. Step 6: Repeat for all 6 mounts to complete your display. Removal note: The adhesive tab is very strong and may leave a mark if removed. Avoid pulling directly off the wall — use a craft knife to carefully cut the mounting tape instead. Need a replacement tab? Contact us and we can supply these separately. |
| Global Trade Identification Number | 00860014168406 |
Baker's Ammonia

Floating Shelves


Correction of product information
If you notice any omissions or errors in the product information on this page, please use the correction request form below.
Correction Request Form